 Back in the saddle again. Tonight's installment will be showing you guys how I have been going about my zeppelin air bags to help keep my guys in the air.
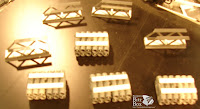
The frames for my bags were made of foam core. (illustration board sheets with a thin layer of foam in between. My test frame was made with three side ribs. Although it let me figure out how I would make the side supports, It was in no way going to be enough to handle any "ham handed idiots" that thought my airships can be handled by anyone. A big pet peeve of mine is people that just pick up stuff that is clearly not theirs, thinking it's perfectly acceptable, because
 "i was only going to look at it" That's crap and you should have asked then understand that the owner could say no and you need to be ok with that.
OK, back to the ribs. The green and white outlines are the ones I went with. they each have more ribs to give the bag better support for tips and falls and people who want to pick up the zep by the bag. I then put pieces of sheet metal along the top and bottom seams. This would allow me to put magnets on the hull of my gondola and help keep my bags in place
 but would allow for ease of storage. I also put metal in the top seam so I can make observation decks. (the thought of stuffing a ratling in the upper deck with only a telescope is too
 good to pass up!)
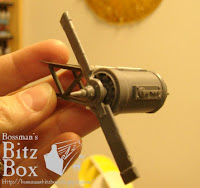
After I got the rigging built I began the process of paper mache' around the ribs. I put on two layers of brown paper to give a good firm skin around my bags. I took my time and made sure I put the paper on with a few wrinkles as possible and to make sure each application was completely dry before moving on to the next layer.
When all of the paper was dry I went to our local Big Lots variety store and bo
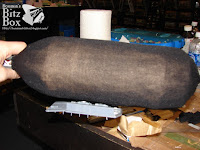 ught two pairs of microfiber tights. they were $1 a set and they were exactly what I was looking for to give the exterior of my air bags a canvas appearance. All that would need to happen next was for me to tighten them up and coat the surface with thinned down glue. to tighten everything up and to affix it to the paper hull. I got two clean coats of thinned down white glue and I set them out to dry. Now if i am lucky I will come up with the right color for the bags so they look go
 od and realistic. I have run into a problem though. The metal I attached to the frame is now under three layers of paper and nylon. The magnets are not holding as well as I would like so I have to impregnate magnets into the bag to help it hold better. Or I may have to place another metal plate on the bottom of the bag to give it a better grip. I will have to try a few options and see what falls out... well, until next time. - Bossman

